
At some point, you’ll find that you need to display information in Microsoft Word in a way that gives you more control than simply using tabs or columns. In those situations, you need to know how to insert and format Tables.
Inserting a Table
In Microsoft Word (as in so many software programs), there are several different ways to perform the same task. And when you’re talking about inserting a Table, there are four ways to do it — just pick one!
Method #1: Inserting visually via the table grid
For my money, the easiest, most user-friendly way is to use the grid provided on the Insert menu:
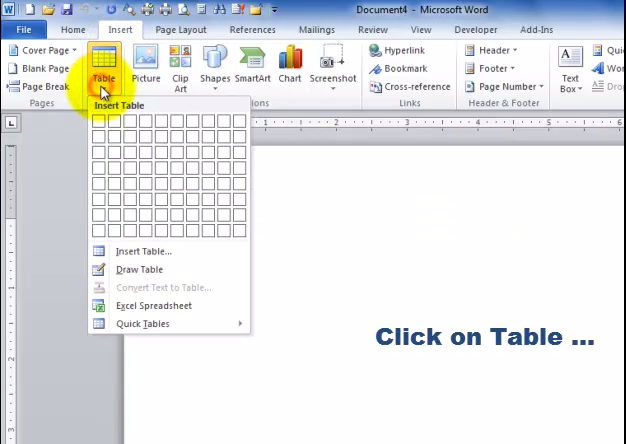
All you’re doing here is going to the Insert tab, clicking on the Tables button, dragging your mouse cursor across the grid (no holding down the mouse button!) until your table dimensions (rows and columns) are just right, then clicking to insert.
Method #2: Inserting via the table menu
If you’re looking for a bit more menu-based approach, click on that same Tables button and choose Insert Table:


Just type in your dimensions (i.e., how many columns and rows) and click OK. And if this is a table size you’ll use a lot, check the box “Remember dimensions for new tables” to save yourself keystrokes in the future.
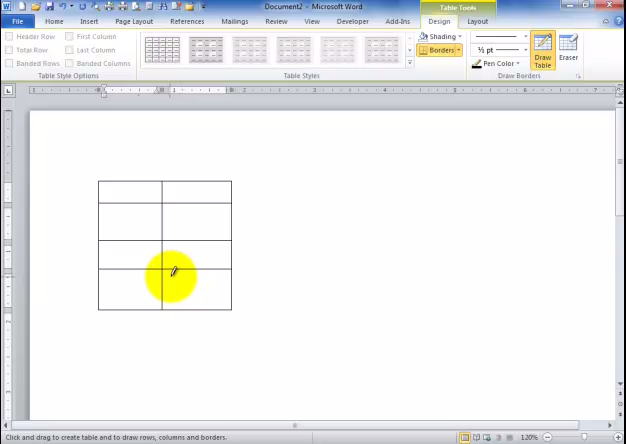
Method #3: Drawing your table
Maybe you’re more the gutsy free-hand type. If so, Word will let you draw your table with your mouse:
Method #4: Inserting a preformatted Quick Table
If there’s a particular visual effect you’re looking for (alternate shaded rows, for example), there may be a Quick Table already stored in Microsoft Word. Going back to the Tables menu, click Quick Tables to see a visual list of some of the preformatted tables you can pick from:

Even if you pick a preformatted table, you can always tweak it a little to meet your needs, but isn’t it handy to have something like this available?
What’s better? Being able to save your own preformatted table for future use. But that’s a whole other tutorial!
One Comment
Comments are closed.