
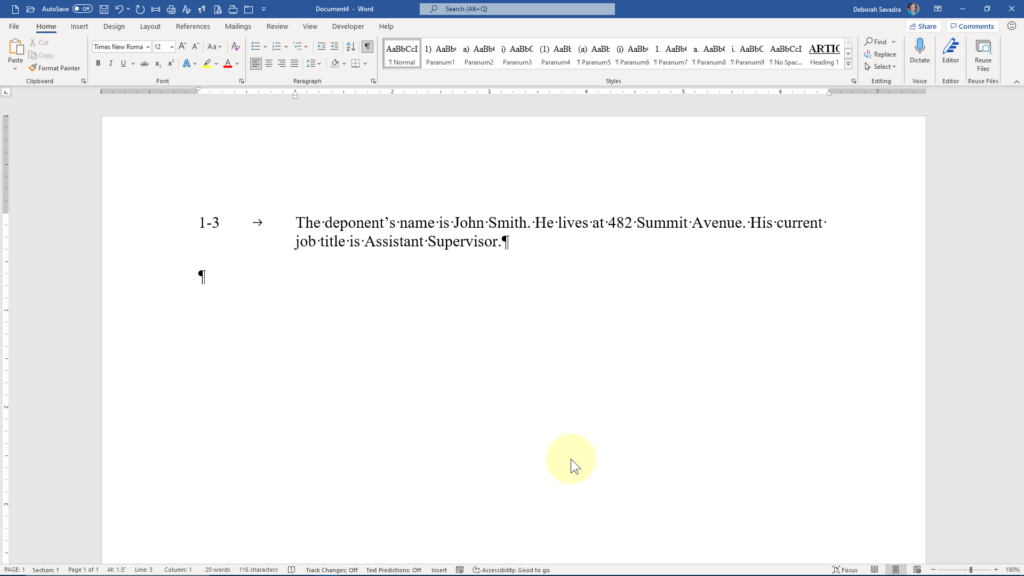
So you’re creating a deposition summary where you list the page numbers to the left and the testimony description to the right (and maybe some other information on the right as well). How on earth do you format that?
Fortunately, Word has three different features that’ll help you get there, depending on exactly what your goals are. Let me compare and contrast them for you.
If your summary only has two columns, one for the location of the testimony and one for the summary, you can pick from any of these three methods: hanging indent, columns, or tables.
Hanging Indents
The hanging indent method is pretty simple. Hanging indents are a paragraph formatting technique that is frequently used for certain endnote citation forms and for numbered paragraphs where the paragraph number sits next to the left-hand margin while the paragraph text is indented.
Select the paragraph where you’d want to start your summary and click the small dialog launcher arrow in the Paragraph command group of the Home tab.
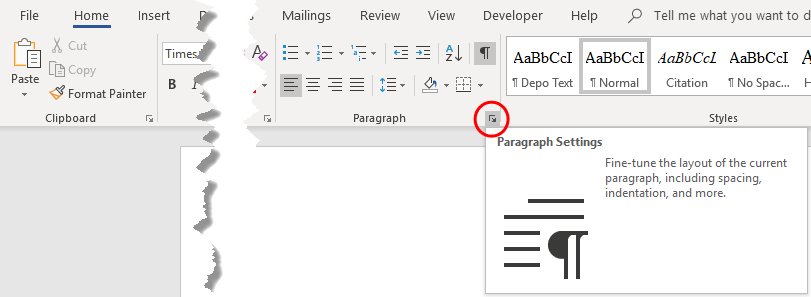
That will take you to the Paragraph dialog box.
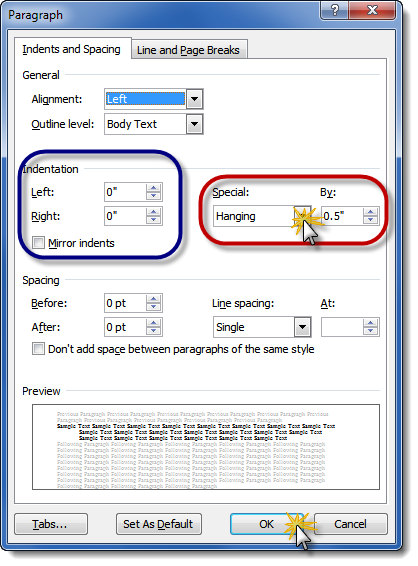
In the middle of that dialog box over on the right (circled in red above), you’ll see a dropdown underneath the word Special. Choose Hanging from that dropdown, then input the amount of space you want your summary column to be indented by either typing it in directly or using the spinner arrows. That measurement will be where your summary column will start. In other words, your page and line designation will be flush with the left margin, and your summary will begin at the measurement you input and will line wrap back to that measurement as you type. When you press Enter, the cursor will return to the left margin.
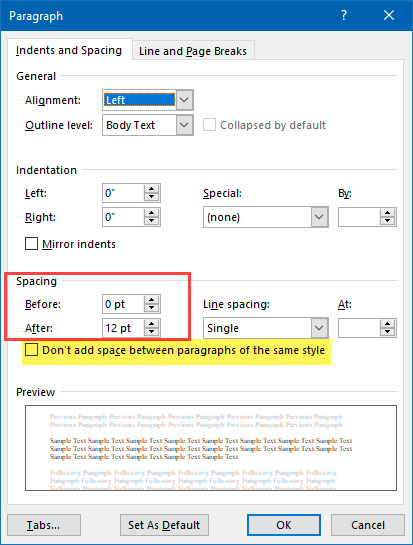
One other setting I find helpful here is to insert a bit of space between paragraphs automatically by using the Spacing After setting here. Be sure the Don’t add space between paragraphs of the same style checkbox is not checked.
Once your paragraph settings are set up, you can type the page numbers on the left, press Tab, then type your testimony summary on the right. Press Enter to end that entry and begin a new one. If you need multiple paragraphs under a single entry, just press Enter and then Tab to move the cursor to the testimony column.
Columns
While the hanging indent technique is super simple to set up, it does have one limitation: you can only have two columns of data. If your summary needs to have a third or additional columns, such as for issue coding, then you’ll need to use either columns or tables.
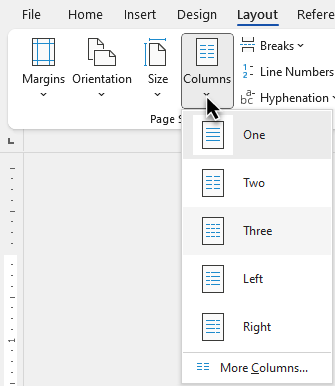
Setting up columns takes a bit of practice, and so does using them. To begin your columns, go to the Layout tab and use the dropdown under the Columns command to choose how many columns you’ll need.
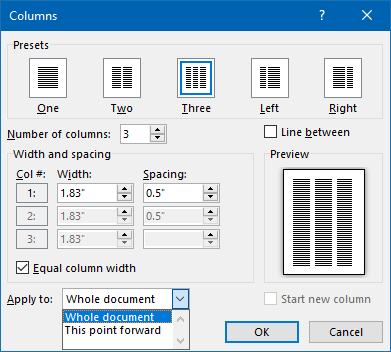
For even more flexibility, choose More Columns and use the Columns dialog box to customize the number of columns, the width of individual columns (be sure to uncheck the equal column width box first), and the amount of space between each column. You can apply these settings to the entire document, from this point forward, or (if your document is already divided into sections via section breaks) just to that specific section.
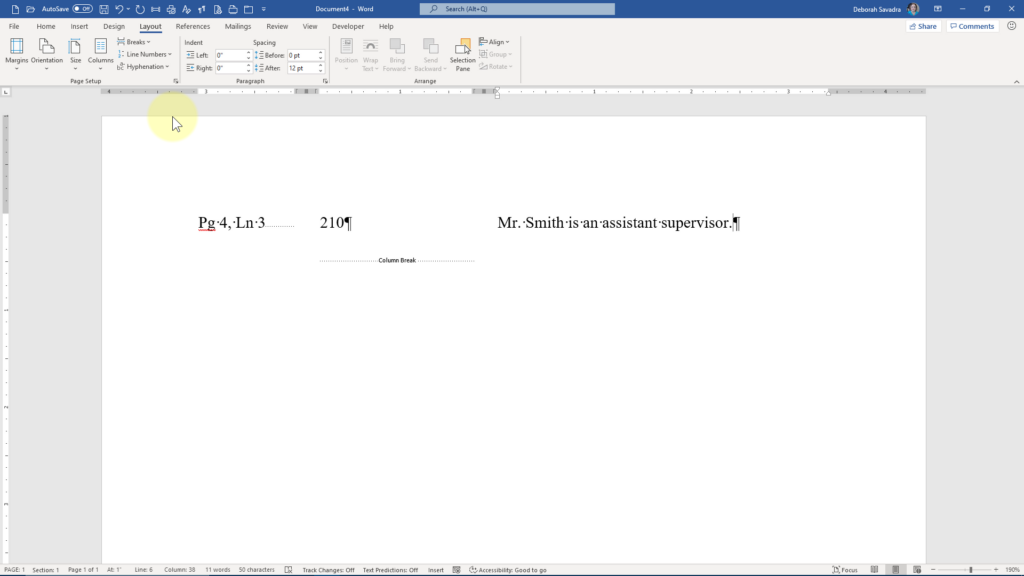
Once you start typing, you’ll need to use either CTRL-SHIFT-ENTER or Breaks > Column to move your cursor to the next column to start typing into it. Once you insert a break after the last column, Word will begin a new page.
If at any point you need to return to a default single-column layout, just go back to the Columns dropdown, choose More Columns
If your summary format requires starting each entry on a new page, columns will accommodate that requirement. However, if you don’t want to waste that much paper, you may find tables are right for you.
Tables
For this use case, tables are my favorite. They’re stable, easy to use once set up, feature easy drag-and-drop control over column width, and allow you to fine-tune where page breaks occur.
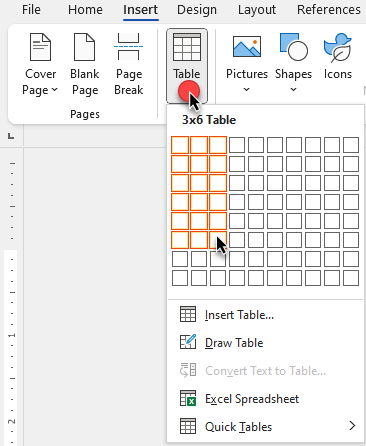
Tables can be found on the Insert tab. My favorite way to insert a table into a document is by using the visual grid. Just move your mouse cursor over the grid until you have the right number of columns and rows (you can always add more later), then click to insert your table.
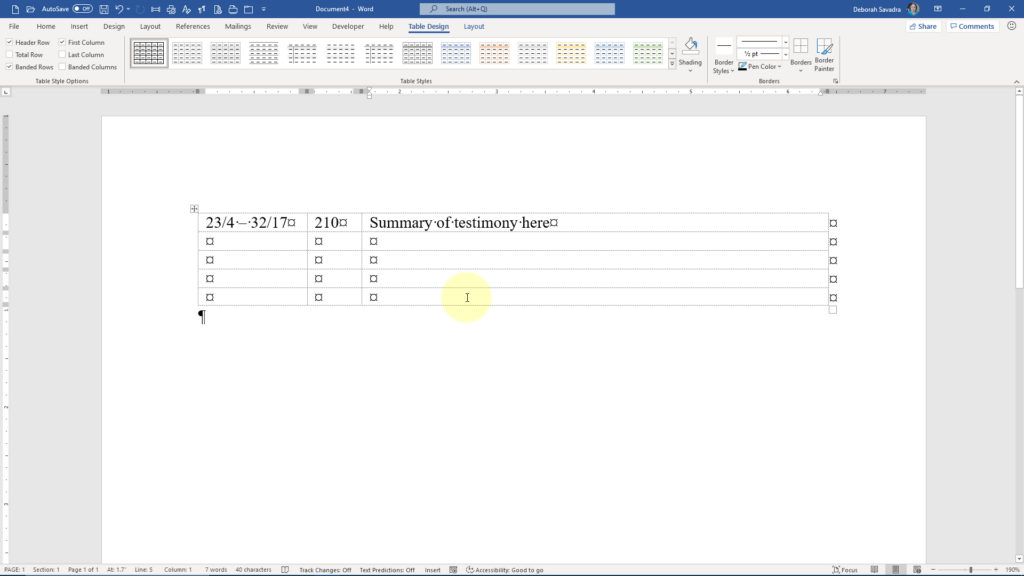
You can remove the default borders by first selecting the entire table by clicking on the crossbar that appears when you hover your mouse over the upper left-hand corner of the table, then going to the contextual Table Design tab and clicking Borders > No Border.
To enter your summary into your table, click your cursor into the first cell, type in your page and line number reference, then press Tab to move to the next column to enter your summary.
And if you’d like to learn how to add a header row that appears on every page or how to add more vertical space between entries automatically, here’s a video on my favorite table tricks.
Summary
Now, I have my own preferences about which of those features to use, but as you can see, if your summary only has two columns, you can use any of them. If you’re listing information into more than two columns, then hanging indent isn’t going to work, but both tables and columns will work. At that point, it becomes a matter of personal preference.
Speaking of personal preference, which of those three techniques are you most comfortable with? Let me know in the comments below.