
Some of the most frequently recycled text in legal documents is header and footer elements such as letter headers, Page X of Y page numbering schemes, continuation messages, etc. If you find yourself reconstructing these kinds of text snippets with every new document, don’t – make it once and save it as a Quick Part so you can re-use it with two clicks.
The specific header/footer element I’m demonstrating in the video above has three parts: the document name and/or path on the left, a Page X of Y page numbering scheme in the middle, and a last update date/time stamp on the right. I’ll show you how to embed these elements as self-updating fields, then save the entire header/footer element as a Quick Part so you can access it from the Insert tab in any document.
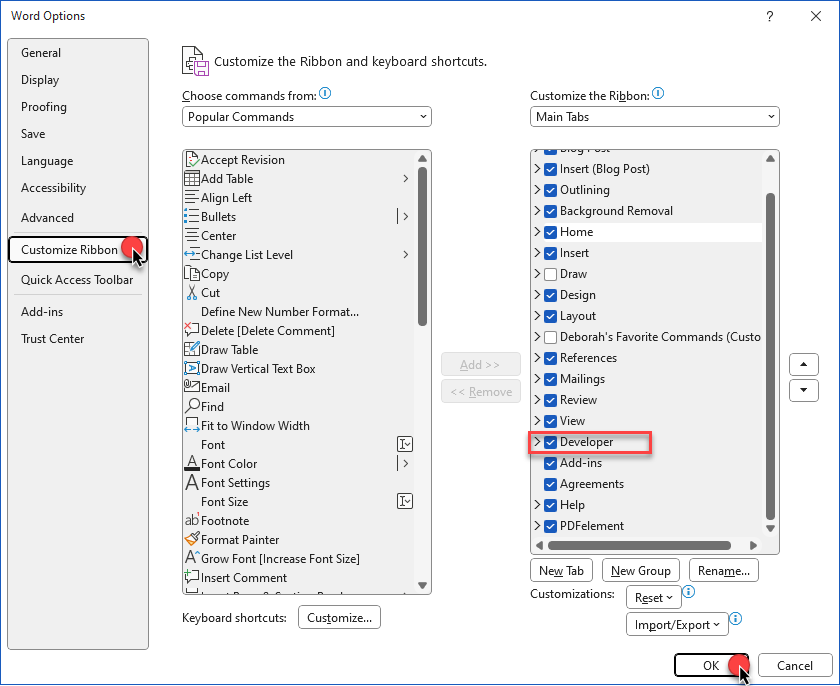
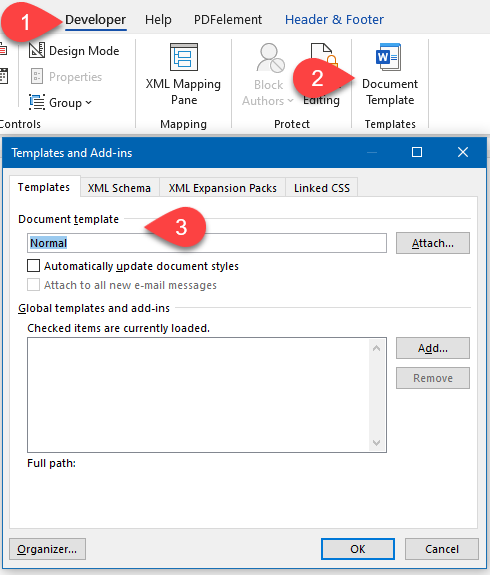
First, let’s start with a brand-new document based on the Normal template. How do I know I’m starting with the Normal template? Generally, anytime you use the new document icon (or CTRL-N, or File > New) to start a document, you’re using Word’s standard Normal template, but you can verify that within any document by going to the Developer tab and clicking Document Template. (Don’t have your Developer tab enabled? Go to File > Options > Customize Ribbon and check the box next to Developer over on the right.)
Let’s start building our reusable footer. First, I’ll double-click into the footer area of a blank document. In most cases, there will be two tab stops in a header or footer by default: a center tab in the center of the line, and a right tab flush against the right margin. That will make it easy to line up our three footer elements.

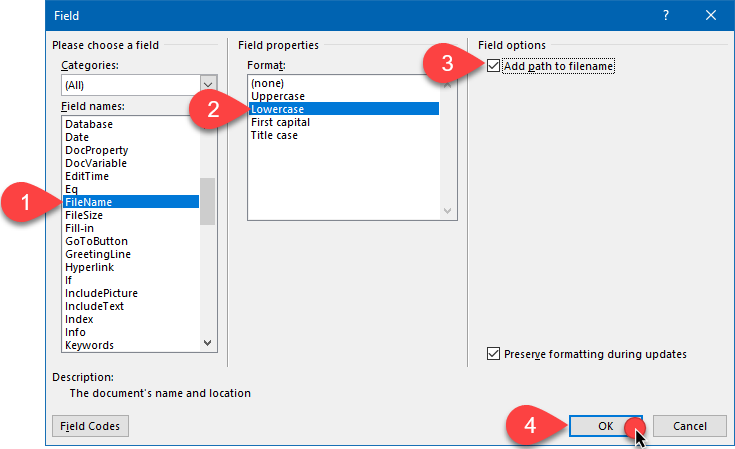
First, let’s embed the document name on the left. On the contextual Header & Footer tab that appears whenever I’m in a header or footer, I’m going to click Quick Parts > Field to go to the Field dialog box and find the field FileName in this list. When I click on FileName, Word gives me the option to display the file name as all caps or upper case, lower case, with just the first letter of the entire file name capitalized, or with the first letter of each word of the file name capitalized. I can also check the box nex to Add path to filename if I want to display the drive letter and folder names showing me the location of the file. Then I can click OK to finish.
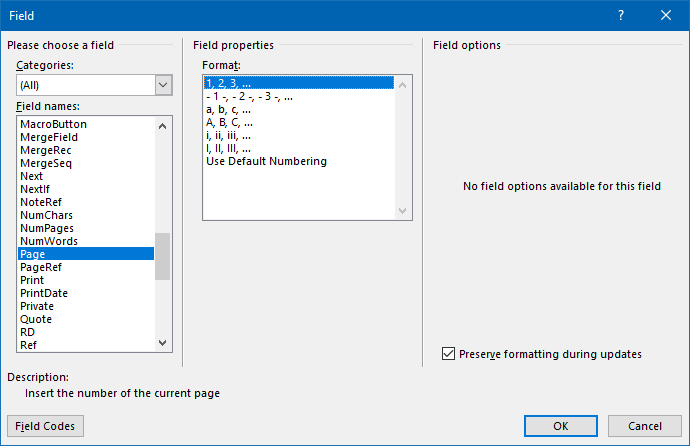
Since I haven’t actually saved this document yet, there’s no information to display, but we’re going to move on to the Page X of Y part of our footer. I’ll click Tab to go to the center tab setting, type “Page” and a space, then click Quick Parts > Field to insert the current page number, which is a field called Page. I can choose the format here, then click OK to insert the page number.
If I want to insert the total number of pages in the document, I can do that, too. First, I’ll type space, “of”, and space, then go back to Quick Parts > Field and this time insert a field called NumPages. I can format that number the same way.

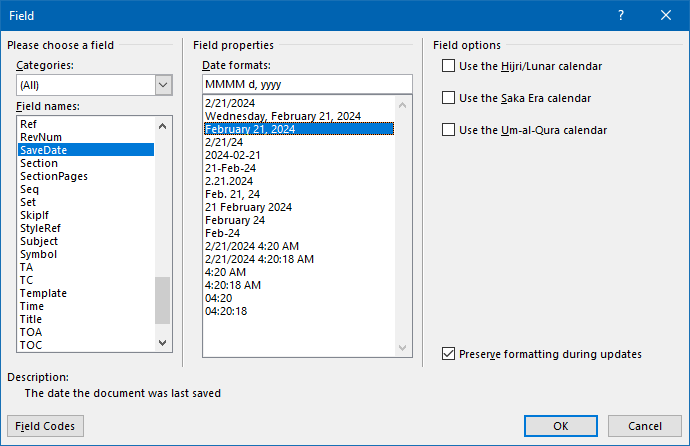
Okay, now let’s move on to the third element in our footer, the self-updating Last Date/Time field. I’m going to type “Last Update”, colon, and space; you can type “Version” or whatever makes sense in your context. Now, I’m going to put in another field called SaveDate. Again, I’ll go up to the Header & Footer Tools and under Document Info I’ll click Field. I could also have gone to Quick Parts right next door and gotten to the same dialog box.
In the Fields dialog box, I’ll look for the field SaveDate, then I’ll use these choices in the middle to format it to show both date and time. Once I click OK, you’ll notice that it’s embedding a date/time format but with all zeroes. Don’t worry; once you use this template to create and save a document, you’ll see the last date and time that document was saved.
Now for the part of this exercise that makes this footer and all three of its elements reusable. I’m going to select this entire line, but I’m going to exclude the end-of-line marker that looks like a paragraph symbol by using SHIFT-Left Arrow, then in the Header & Footer Tools I’ll click Quick Parts > Save Selection to Quick Part Gallery.

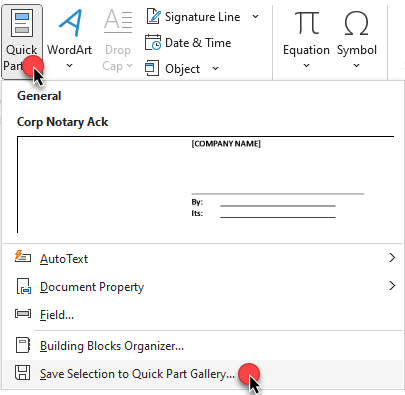
Once I’m in the Create New Building Block dialog box, I’ll name this footer something that makes sense and, instead of saving it to the Quick Parts Gallery, I’ll save it to the Footers Gallery. (If you’re creating a header instead, you’d want to save it to the Headers Gallery.)
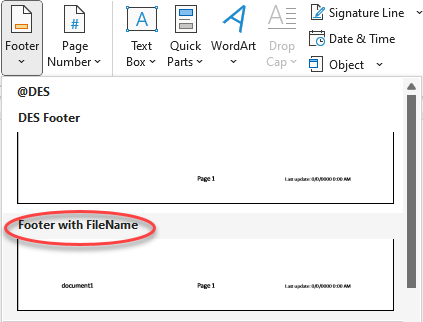
And here’s one thing I’ve learned the hard way: If you want to make your custom footer or header or any custom Building Block easier to find, create yourself a category that’s guaranteed to sit at the top of the list. I usually use the @ symbol with my initials so I know everything in that category is a custom Building Block that I created. You may want to do something different, but I’d definitely recommend NOT putting your custom Building Blocks into the General category.
If I have a specific template I want to use this in, I could choose a different one here, but I’ll just use the default Building Blocks and click OK to finish.

Now let’s test this. I’ll start a brand new document with CTRL-N, then go to the Insert tab and click Footers, and there’s my custom footer right there near the top in my custom category. All I have to do is click it, and my custom footer is inserted into my document.
So this is just one example of a customized footer you can build and save for re-use in Microsoft Word. I love the Building Blocks features in Word, so much so that I teach an entire course on it called Assemble Documents Faster. For more information on that course, click below.
This content is part of a course
What you’ve learned here is just a small part of my Assemble Documents Faster course, where you can learn all sorts of skills for creating and editing documents faster, such as Quick Parts, Autotext, and automatic paragraph numbering with cross-referencing. Click here for more information.
This is absolutely brilliant. For an attorney who doesn’t have a lot of time to mess with the tricks of WORD, this one is a time-saver/life saver. Thank you.
Glad that’s helpful! I love Building Blocks and make use of them wherever possible.