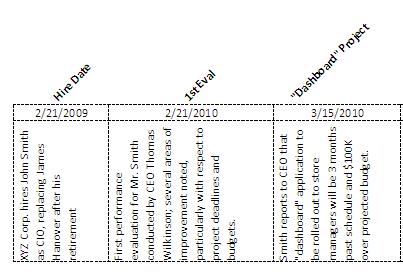
Recently, a fellow reader, Jessica from Miami, asked if I would help her figure out a way to create an event timeline in a format her boss is partial to:

She tried to find templates online, but nothing really seemed geared to a legal context.
I tried solving this problem in Word, but no real luck. So, since Jessica was pretty comfortable with Excel, I developed a template for her there.
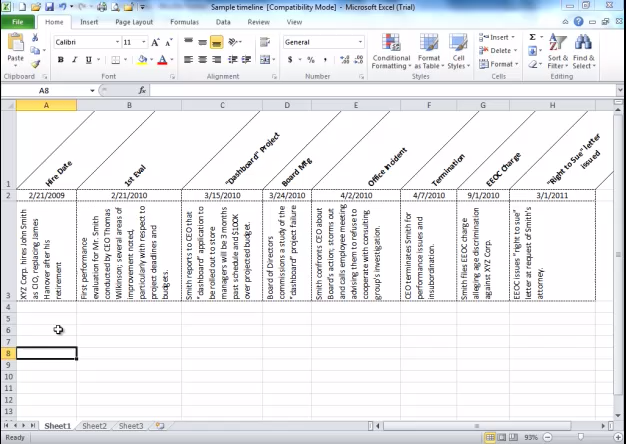
Changing the orientation of text within cells (vertical, horizontal, or diagonal, as in the example above) is actually pretty easy. Here, I’ll show you:

[To view full-screen, hover your mouse/touch your finger/stylus over the video screen, then click the expand button near the lower right-hand corner of the video player]
There’s other formatting here too — the cells are wrapped (the Wrap Text checkbox above), I shifted the vertical alignment to Bottom, and in some cases, to get the middle cell to look more “centered,” I added a hard return before the text (with ALT-ENTER). There’s a fair bit of eyeballing to do to get it to look right, and it’s all a judgment call according to your personal preference.
What uses could you find for this trick?
(P.S.: Jessica seemed to be pretty happy with her new template last I heard!)

Thank you so much for responding so quickly and professionally to my “challenge”! The document was incredibly helpful and I’ve put it to use right away.
This is really helpful! Thanks for sharing.
Great tutorial. It went hand-in-hand with the other Excel tutorial on hard returns, text alignment and formatting. Managed to follow the steps easily, but I was hoping to find out the trick for creating the diagonal lines in your top row of cells.
Once you slant the text, the cell borders (if you have created any) will be slanted as well. When you’re in Format Cell, click on the Border tab and set up your cell borders.
LOL – that seems too easy. Maybe I’ve been intimidated by Excel all these years without good reason.
MEDICAL CHRONOLOGIES!
Wow – I’m glad you’ve found a good use for this! 🙂