
If you frequently edit documents in “group” mode (exchanging drafts of a release with opposing counsel, for example), you’ve probably used Word’s Track Changes feature to stay on top of the edits.
Track Changes, however, has its problems. Sometimes it’s tricky to even tell if Track Changes is turned on. That becomes particularly important when you’re exchanging documents with people outside the office (and critical when it’s opposing counsel you’re dealing with). After all, if you don’t know that your own edits are being tracked and recorded, you may be inadvertently revealing confidential information.
Fortunately, you can tweak certain settings in Microsoft Word to ensure that you don’t get tripped up by hidden tracked changes. Here are my suggestions for features you should turn on so Track Changes is always open and obvious and under your complete control.
Tweaking Your Status Bar
The Microsoft Office Status Bar (that long gray bar at the bottom of every Microsoft office application) is your friend. While Office, as initially installed, doesn’t really show you much beyond what page you’re on, it’s possible to pack that Status Bar with all kinds of useful information. One of those indicators not only will tell you whether Track Changes is on, but will also allow you to toggle it on and off with a single mouseclick.
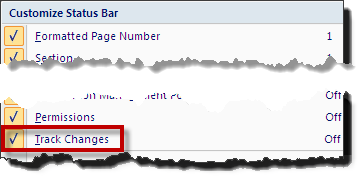
All you have to do is right-click your mouse anywhere in the blank space in that long gray bar at the bottom. You’ll see a pop-up menu called Customize Status Bar. For our purposes here, you need to make sure that there is a checkmark next to Track Changes, but I advocate checking just about everything, because that information often comes in handy for such tasks as diagnosing formatting problems.
Checking Your Trust Center Settings
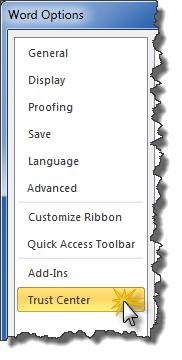
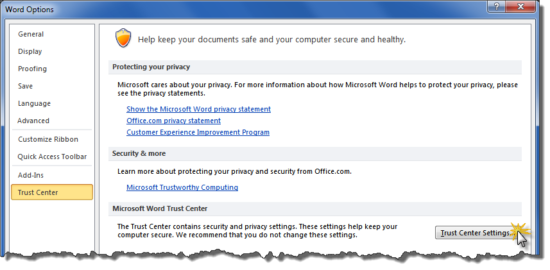
If you’ve never checked out the Trust Center in any Microsoft Office application, you may be inadvertently exposing yourself to some pretty nasty stuff. I highly recommend going into Trust Center and checking out the various settings. To get to the Trust Center in any of the Ribbon-based versions of Word, go to the File tab and click Options; Trust Center will be one of the choices along the left. Once you’re in Trust Center, click on Trust Center Settings to access the security and privacy settings.
As far as Track Changes is concerned, the highlighted settings below are what I recommend:
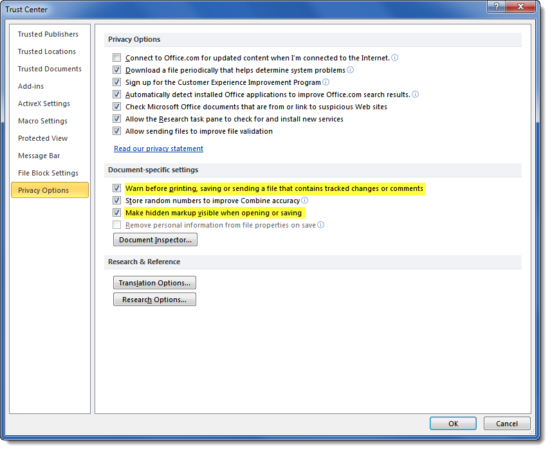
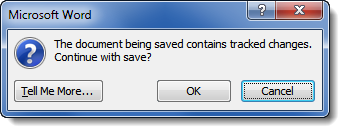
That first highlighted setting enables really helpful popups like this one that appears when you save a document with tracked changes:
If you see this checkbox checked:
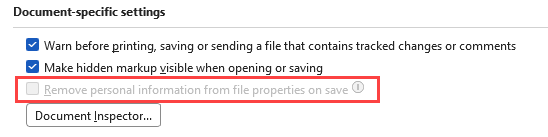
… you will find that any tracked changes you add to that document will have their author attribute disappear when you re-save the document. If you open a document (such as an email attachment) and see this banner:

… click the Change setting button as shown above to turn this setting off.
Make it a point to check the settings above every time you open a document from an outside source. Yes, it’s a pain in the neck, but you want your documents to be secure, right?
Scrubbing Your Docs Before Sending Them Out
If you’re not fortunate enough to work in a firm that already has a metadata scrubber application installed on all computers (check with your IT person if you’re not sure), you’ll need to scrub the metadata out yourself. If you look at the illustration above, you’ll see a button called Document Inspector. When you’re finished editing your document, and just before you email it, click on that Document Inspector button:
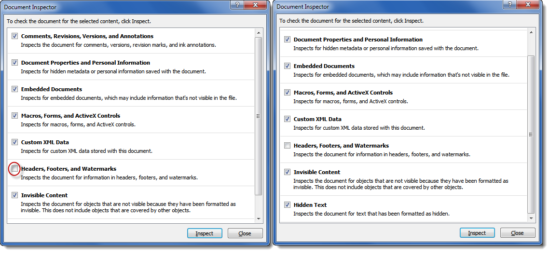
As you can see, Document Inspector will check for all sorts of metadata in your document. (I tend to exclude the check for header, footer, and watermark information since that tends to delete my page numbers.) Clicking on Inspect starts the process that will quickly produce something like this:
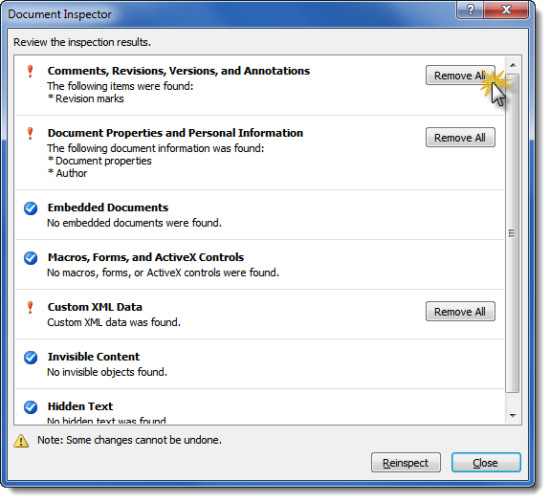
Obviously, anything with a red exclamation point indicates Document Inspector found something you may want to examine more closely. Each item has a Remove All button you can use to strip out that particular category of metadata. Once you’re satisfied that the document is clean, you can click Close and send the document on its way.
What information do you want to be absolutely sure doesn’t fall into the wrong hands? Let me know in the comments below.
This content is part of a course
What you’ve learned here is just part of my Track Changes Plus course, where you can learn how to leverage Track Changes to make co-editing documents with other easier and saver. Click here for more information.
I am interested to know more about Track Changes and the Document Inspector (for my home use of WORD). We have metadata safeguarding software at work, but many clients use Track Changes so I need to know more about it. Thank you.
Here’s a quick and easy way to get to everything I’ve written about Track Changes: http://legalofficeguru.com/tag/track-changes/
I’m hoping your info will explain how to send a marked up draft (with deletions, inserts and balloon comments) via e-mail. My problem is, I saved my marked up as Word mark up, using Tracking, and emailed it. Recipient can see all changes in screen but when he printed them out, changed areas came out a just a blank space. No underline, no markup color. Just a blank gap on each line where I entered changes. Windows 8. Word 2010.