
In my observation, if there’s one thing you lawyers love, it’s repeating yourselves. No, not when you speak (except when you walk around the office repeating the same war story about your latest court appearance to anyone who’ll listen); it’s when you write. Y’all recycle so much old material from briefs and other documents, it puts Ed Begley, Jr. to shame.
Some of the problems with all that cutting and pasting are pretty obvious—another client’s name being left in (oops) or funky formatting that doesn’t match the new document. But others aren’t. What sort of evil stuff lurks in that text you just pasted over from your last magnum opus? And how’s it going to undermine your next court filing?

Click the image above for more details.
The problem with “hidden” text is … it’s hidden
Briefs (the kind that have Tables of Contents and Tables of Authorities in them) present a special problem to unrepentant text recyclers: hidden text. Unless you really know what you’re doing, all that citation marking in your old brief is going to come right over to your shiny new document and wreak all manner of havoc.
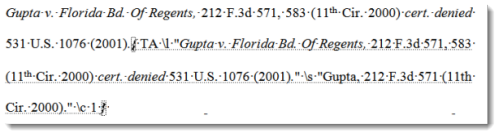
The field codes that drive an automatic Table of Contents and Table of Authorities are a variant of what’s known as hidden text. That stuff’s hidden for a reason. After all, nobody wants their document printing like this:
So Microsoft Word hides all that information in the background (unless you press Show/Hide or ALT-F9, either of which will bring that information out of hiding).
But if you can’t see your hidden text, you can’t account for it while you’re dragging the mouse or keyboard cursor over it, preparing to drop your oh-so-masterful prose into another document. And what you paste—or don’t paste—can screw up a Table of Contents or Table of Authorities faster than … well, anything I can think of.
Trying to fix your TOA or TOC? Good luck with that!
Once you’ve pasted a bunch of text from another brief and tried to generate a Table of Contents or Table of Authorities, getting any of those field codes you’ve brought over to behave can become a full-time job. One word: Don’t. (Seriously. Just. Don’t.) Altering the format of a TOC or tweaking the Styles in a TOA is one thing; fixing the content of one is another.
No, Clear Formatting won’t help, either. These are field codes, not formatting codes, so the various tricks I’ve taught you about how to strip out misbehaving formatting aren’t going to do you any good here.
Getting a clean slate with Find and Replace
Here’s another instance in which Microsoft’s favorite remedy for every problem (namely, rebooting) comes in really handy. No, I don’t mean literally rebooting your PC. It’s not going to come to that. But to get your pasted text to behave properly when it comes time to generate your TOA or TOC, your best bet is to nuke the field codes out of the pasted text, preferably before you drop that text into your new document. Sometimes, starting over is both faster and easier.
Setting yourself up to succeed
If you’re going to drop large amounts of text from another document (or multiple documents) into your current document, you need to do three things first:
#1 – Set hidden text to show
First, if you’re going to be deleting hidden text like TOA or TOC codes, you need to be able to see them. Generally, turning on Show/Hide (that button that looks like a paragraph symbol in the middle of the Home tab) will show you everything. However, it’s possible to toggle the display of individual items on or off. Since I can’t see how your Word installation is set up, I want to make absolutely sure you can see hidden text while you’re editing.
First, go to the File tab (in Word 2010 or 2013) or click the Office button in Word 2007, then click Options.
Click Display on the left. You’ll see a section called “Always show these formatting marks on the screen”:
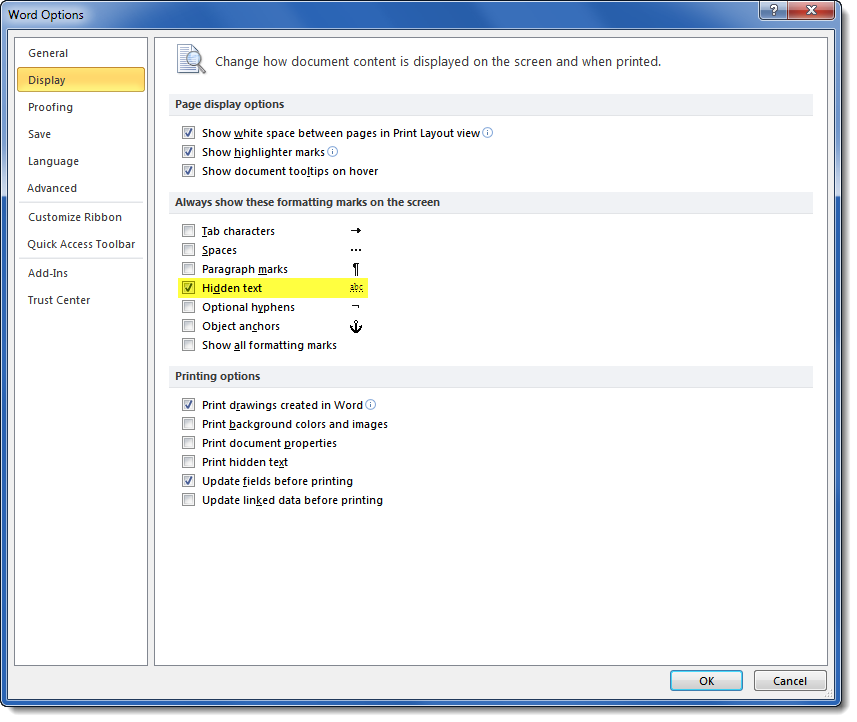
Whatever else you check, make sure “hidden text” is checked. This way, regardless of whether you have Show/Hide turned on or off (and some people find all those other marks annoying), you’ll still see the TOA/TOC markings while you’re editing. You can always go back into Options and turn hidden text off again when you’re done.
#2 – Check your cut-and-paste settings
Don’t leave Options yet–we’ve got one more thing to check.
Click “Advanced” on the left-hand side of the Options dialog box and scroll down a bit to the section called “Cut, copy and paste”. Depending on how you or your IT person installed Word, you’ll see some options that look like this:

For the “Pasting between documents” option, I recommend staying with the default choice, “Keep Source Formatting”. For “Pasting between documents when style definitions conflict”, I recommend “Merge Formatting”.
If you go with “Keep Text Only” on either setting, you risk having underline and italics stripped out of whatever you copy from your old brief, which means you’ll have to go back and restore all that citation formatting in your new brief. Not a good thing to be doing when it’s T Minus Deadline.
If you’re a cut-and-paste rock star, you already know that you can circumvent these settings each time you paste by using the drop-down under the Paste button on the Home tab rather than always using CTRL-V like a noob.

If you’ve never seen that before, click here to get the lowdown on this handy feature.
#3 – Start a new blank Word doc as a “staging area”
If you’re going to be copying lots of code-laden text from your old documents into your latest magnum opus, do yourself a favor and do your code-stripping operations in a blank document window rather than your new document-in-progress. There’s less chance of you accidentally stripping out essential codes in the rest of your document.
To use your staging area, just copy the text from your old document, paste into your staging document, perform the code-stripping operation I’ll be showing you below, then cut the text out of the staging doc and paste it into your new document.
How to strip TOA/TOC codes out of your recycled text
Okay, enough of the preliminaries. Let’s get to it.
You’ve found that oh-so-persuasive prose you wrote once upon a time in an old brief, and you want to use it again. So you’ve pulled it up in Word, paused for a moment to consider your brilliance (don’t lie, I know you did), then dragged your mouse across it to select it and hit CTRL-C to copy it.
Here’s where the staging area comes in. Do not, I repeat, DO NOT paste this text directly into your new brief. Trust me on this. That would be the legal writing equivalent of getting Gizmo wet or feeding him after midnight. Instead, paste it into your blank “staging” document and work with it there.
If you’ve gotten your Show/Hide configured so you can see hidden text, you’ll see something like this:

Now that you have this text in the staging area, you’re going to take out all that stuff that’s between the curly brackets (starting with “TA” all the way through the end of citation markup). And you’re going to do this with the help of Microsoft Word’s Find-and-Replace dialog box.
Finding Find and Replace
If you’re lucky, you can use CTRL-H and go directly to Find and Replace. If your installation of Word has had this particular shortcut key replaced with another function, don’t fret. If CTRL-H doesn’t get you this result:
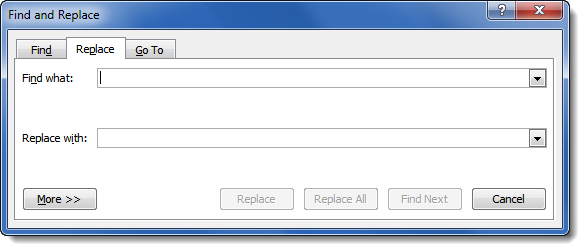
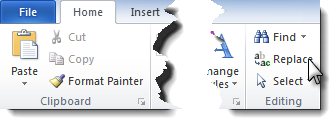
… then go to Home tab and, on the extreme right-hand side, click on the Replace button:
Once you’re in the Find and Replace dialog box, click on the More button at the bottom to expand the dialog box to include more options. Click Special and then Field in the list that pops up:

This will put “^d” into the “Find what” field. What you’re doing here is asking Word to find any Field (including, but not limited to, TOA and TOC field codes) and replace it with nothing (technically, null). And here’s the beauty of using a staging area to do this: in this limited text snippet (as opposed to a full brief), you probably don’t have any other field codes you need to keep (page numbers, cross-references, etc.), so you can Replace All and get them all in one go; otherwise, you’ll have to click Find and then repeatedly click Replace to review them on a case-by-case basis to verify whether Find-and-Replace can delete them safely. This is also why you want hidden text turned on first, so you can see the codes before you delete them.
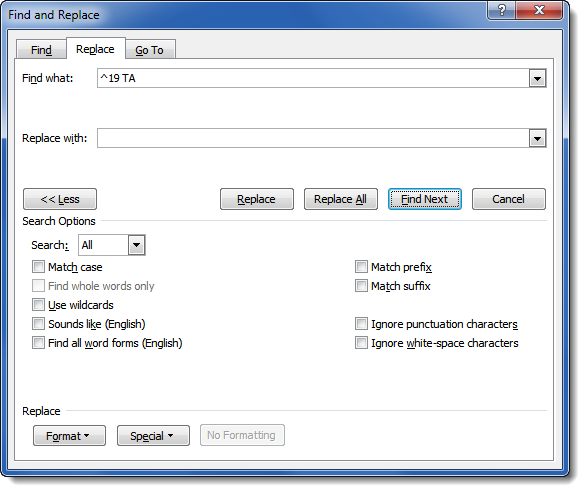
Update: Oh, hallelujah, there’s actually a way to search for TOA fields specifically! Instead of using ^d for a generic field, use “^19 TA” (without the quotes, obviously):
Once you’ve cleaned up the text in your staging area, you can press CTRL-A (to select all the text), CTRL-X (to cut the text), then switch to your brief-in-progress and paste the text (using either CTRL-V to use the default pasting options, or the Paste button to choose which type of paste action you want).
The benefits of learning to do these things my way
Constructing a legal brief (particularly the appellate variety) is not for the faint of heart. The legal research and writing is hard enough (and, thankfully, not my job), but you haven’t experienced frustration until you’ve been up against a deadline, doing your cursory Table of Authorities double-check and noticing that ABC Corp. vs. XYZ Ltd. is showing on page 9 when, dammit, it’s not there. If you’re going to cut-and-paste previous writing into your next project (and, try as I might, I can’t seem to stop any of you from doing it), at least learn how to rid the text of all those nasty little codes that will just make more work for you in the end.
Oh, and another thing: wait until you finish moving big blocks of text around before you start re-marking citations. But that’s the subject of a different post.