
Need to give the text in your table a little breathing room? I’ll show you how to customize the interior margins, both for the table as a whole and for individual cells.
If you’re often frustrated with how text is formatted within tables, you’re in luck. A lot of people don’t know you can actually modify the interior margins of entire tables and individual cells and rearrange the alignment of text within cells, centering it vertically or horizontally, for example.
This skill comes in particularly handy even if you never deliberately use tables, because if you print labels from Word, you’re already using a table, which is how Word configures labels. So, learning how to edge the text away from the cell borders can make the difference between printing labels correctly … or not.
By default, tables offer a minimum of space between entries. But if you find that a little cramped, you can control it. Put your cursor somewhere inside your table, and you’ll see the Table Design and Layout contextual tabs pop up:

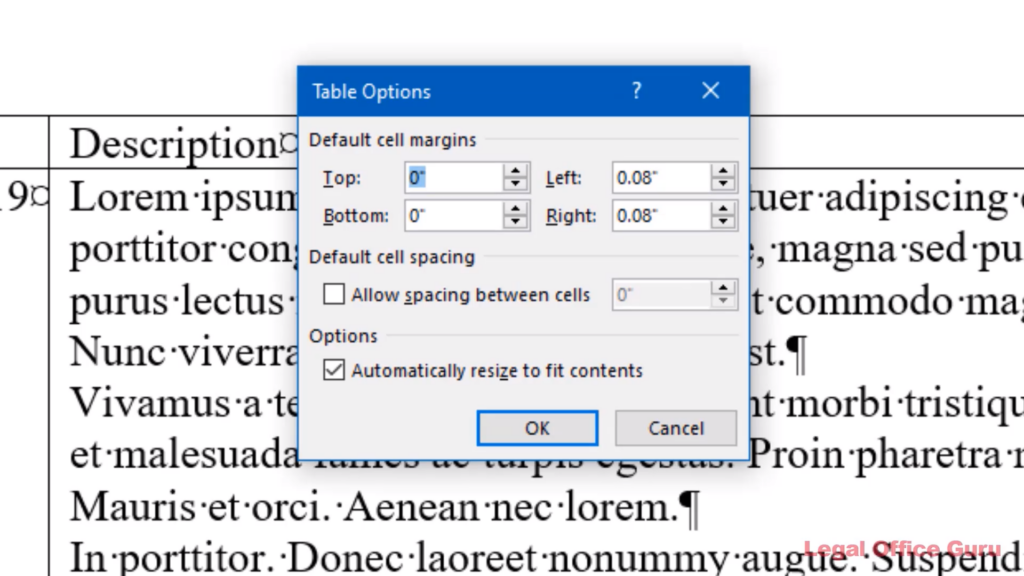
Choose the Layout tab on the right and click Cell Margins. The Table Options dialog box that pops up allows you to reset top, bottom, left and right margins for every cell in the table simultaneously.
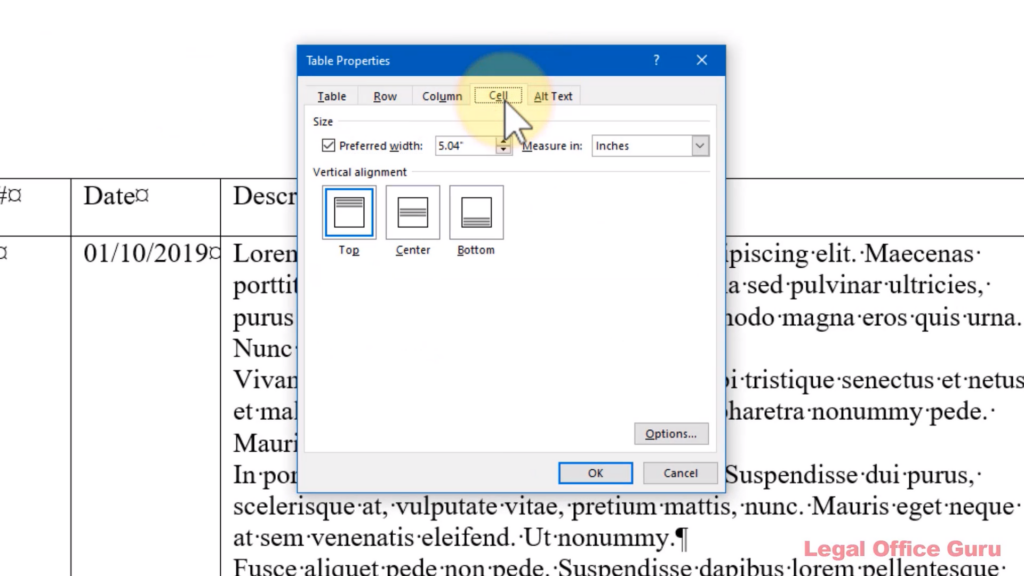
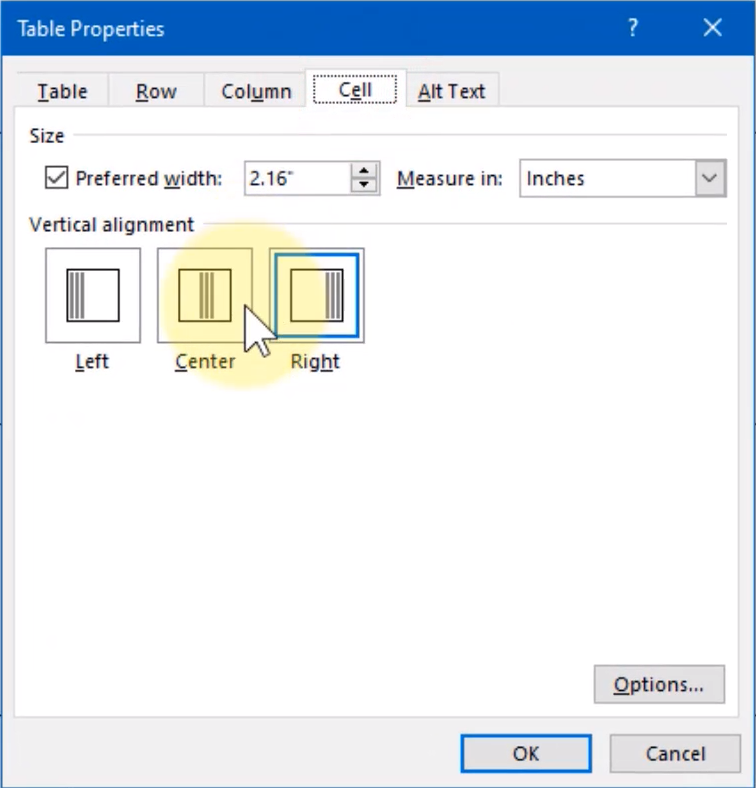
Now your text has a little more breathing room. If you want to reset the margins for one particular cell or range of cells you’ve selected, go to Table Properties and click on the Cell tab:
Click Options and uncheck the box next to Same as Whole Table. Then you can reset the margins for just the cell or cells you want.
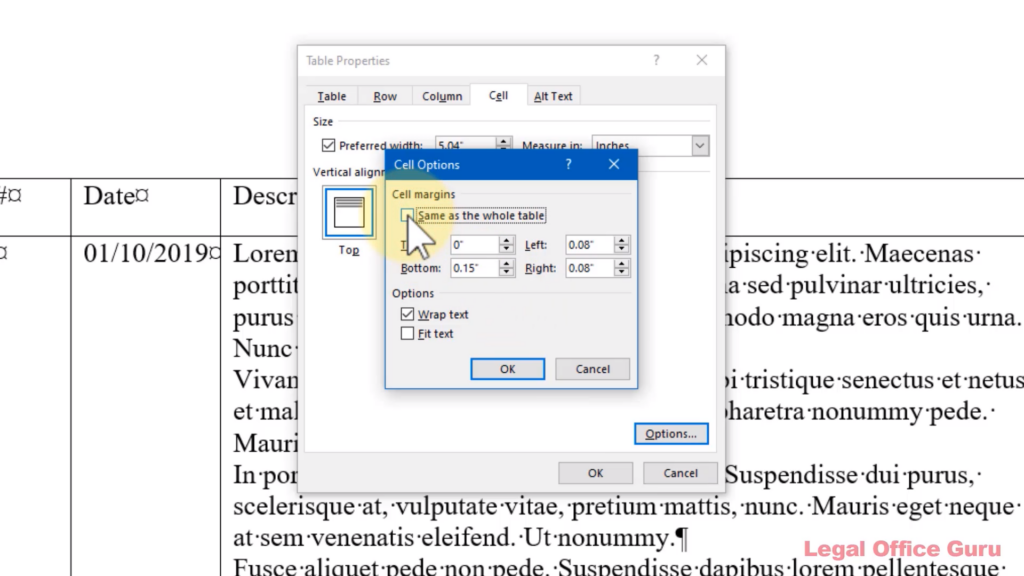
Then click OK, and OK again.
By the way, this trick comes in really handy when you’re working with labels in Word, particularly if you find your text is sitting uncomfortably close to the top margin. Just reset that top margin to move your text down a bit.
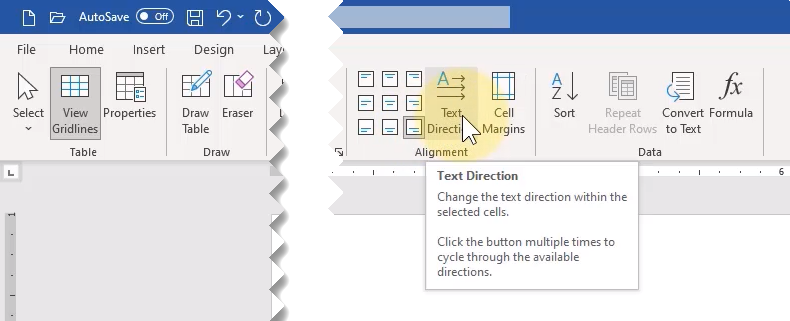
You can change the vertical and/or horizontal alignment of your text within selected cells with one click. Just go to the Table Layout tab and in the Alignment command group, click the button that corresponds to the way you want your text to align. Just look at the pictures on the buttons:
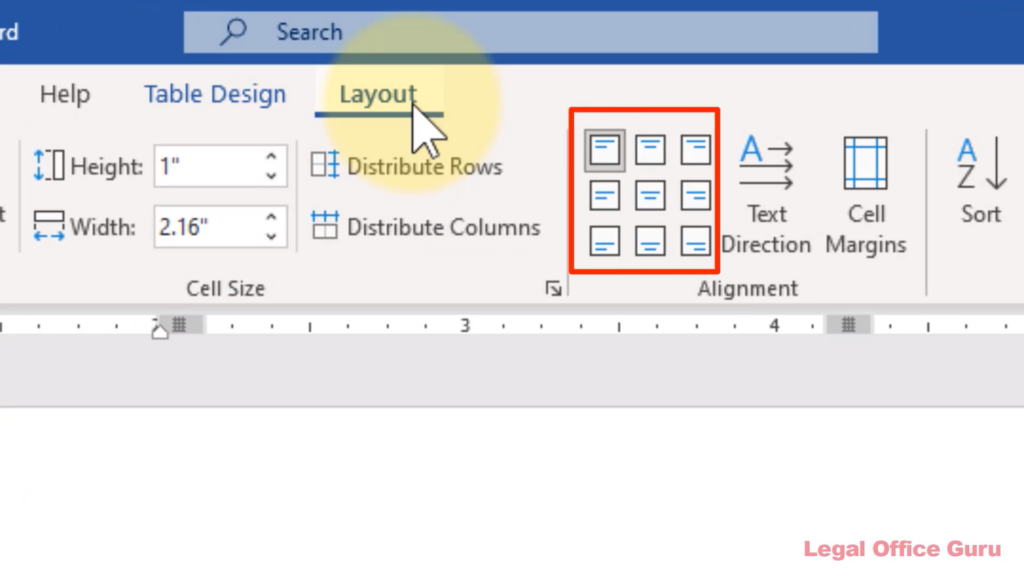
You’ll also notice that you can change the text direction as well (that button to the right will let you do some kind of cool things like show a title vertically rather than horizontally).
You can also change a cell’s vertical alignment within the Table Properties dialog box:
… but really, the buttons in the Alignment command group are so simple and visual, why would you?
That, by the way, was one of over 40 lessons available in my Basic Word Skills for Legal Professionals course. If you’d like to learn more about the course, click the link below.
This content is part of a course
What you’ve learned here is just a small part of my Basic Word Skills for Legal Professionals course, which will take you from “I don’t know where to find any of the commands” to “I know exactly how to do that!” Click here for more information.
In any event, I hope this has helped you format your Word tables a little better, but if you have any questions, be sure to leave a comment below.
1. Your philosophy of learning WORD or any other software is spot on. Someone once told me it was like drinking from a fire hose.
2. I’m interested in your online course ” Basic Word Skills for Legal Professionals course” @ $67.00 but since I use Mac OS I was wondering if the course was compatible ??? I currently have WORD for MAC as part of a Microsoft 365 subscription.
(1) Thanks!
(2) Unfortunately I don’t own a Mac, so my courses don’t translate the instructions into Mac. Sorry!