
One of the things I’m on a rant about these days is loooooong documents. Complicated documents, like 20+ page contracts and appellate briefs and stuff like that.
Why? Because they always seem to need special stuf inserted in them. Like custom headers and footers. And level-1 and level-2 and level-out-the-wazoo headings. It’s enough to make your head spin.
But if you’ve got mad skills and you plan your document right, a lot of this stuff becomes easier. Like putting in a simple table of contents, for example.
Two ways to create a TOC (the easy way and the not-as-easy-but-more-flexible way)
There are actually two different ways you can construct a TOC. The first method, using Heading Styles to designate the content and hierarchy of your TOC, is simpler, smarter, and a lot easier to make changes to.
It’s got a lot going for it, but it does have its drawbacks. (More on that later.)
So if one of your mad skills is using the Styles feature to format your document headings, that’s going to make it way easier to pull together an automated table of contents. Once you’ve marked each heading and subheading with the appropriate level style, those same styles can be the basic building blocks for a table of contents that updates itself. (How cool is that?)
Here, let me show you:
Creating Table of Contents entries using Styles (a.k.a. the easy way)
See, that’s not so hard, is it?
Creating Table of Contents entries by marking TOC entries (a.k.a. the not-as-easy way)
There is another way to create a Table of Contents: marking each heading with a special hidden code to designate what level of the TOC you want it to appear in. Once you’ve marked it, it looks something like this:

This method has some advantages and disadvantages:
Advantages
- You can customize the content of the TOC entry; in other words, it doesn’t have to match exactly with the text of the document itself
- You can also customize at which level your TOC entry will appear, regardless of how it appears in the hierarchy of your document
- You can include TOC entries that aren’t based on headings
Disadvantages
- More steps involved to set this up – you have to mark each TOC entry
- This is the older “legacy” method of creating a TOC, which may mean it’s going away in a future version, so documents you create now aren’t future-proof
- Potential pagination problems if you leave Show/Hide turned on when updating TOC
If, however, the Table Entry Field method is one you’d prefer to use (even with the warning that your document may not be future-proof), here’s how you do that:
Updating a Table of Contents as you update your document
You don’t have to wait until your document is 100% finished to insert a Table of Contents. Once you have even the first entry marked (by either method), you can just refresh it, either by pressing F9 (that’s one of the function keys across the top of your keyboard) or right-clicking on your TOC and clicking Update Field:

Word will ask you if you want to update just the page numbers or the entire table (in case you’ve added entries to it while editing). To me, it doesn’t hurt to just go ahead and update everything, but that’s up to you.

Modifying a Table of Contents
Okay, now you’ve built a Table of Contents in Microsoft Word using the Styles feature to mark the TOC entries or by marking them manually. And just when you’re about to pat yourself on the back for having an automatic Table of Contents in your document, you notice something’s a little … off. Maybe the font’s not quite right. Perhaps the font’s okay but the spacing’s not. Or the indentation. It could be you want/don’t want the dot leaders running up to the page numbers.
Suffice it to say you just want to alter the format of it. But how?
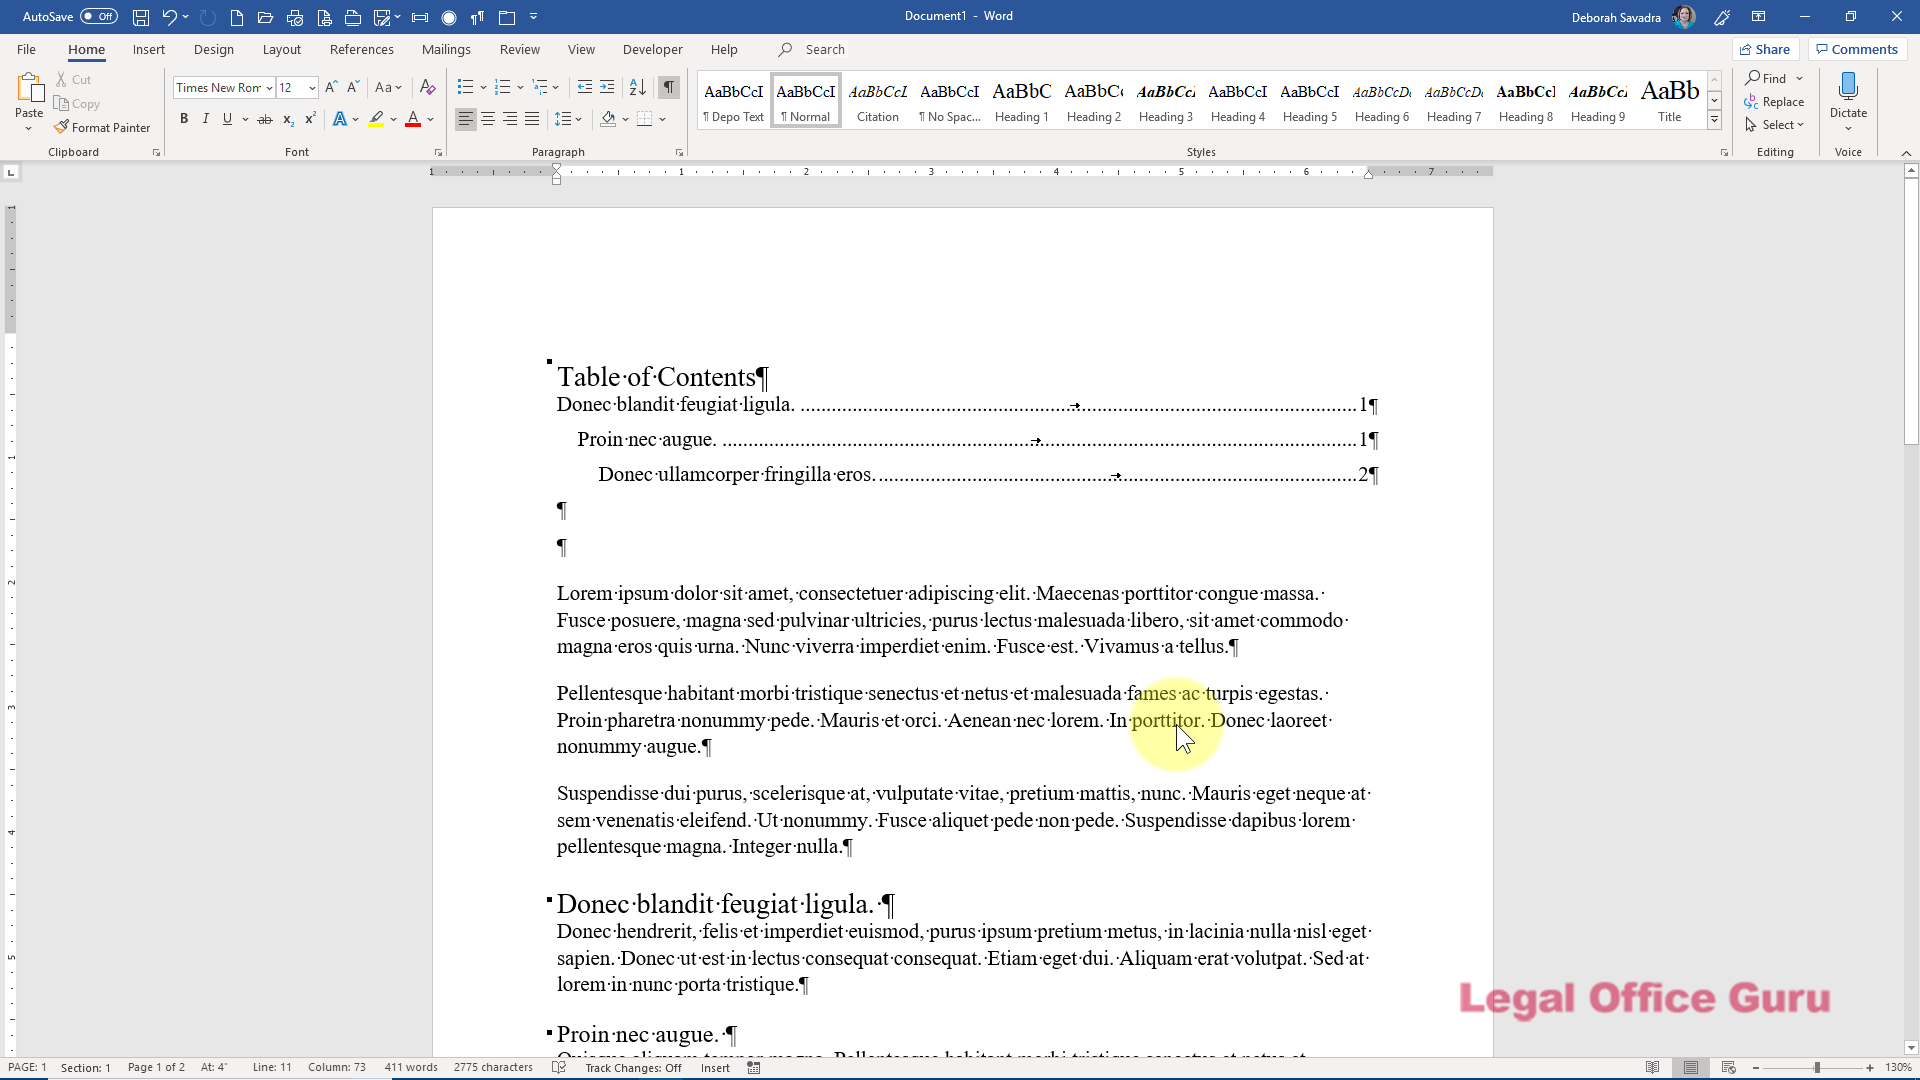
First, let’s take a look at a sample generated Table of Contents:

Right away, I see several problems:
- Fonts are not consistent. There’s a mix of Times New Roman (the font for the rest of the brief) and Arial.
- I’d probably prefer a bit more white space between the second-level entries.
- I don’t like the way the right indentation on the second-level entries is behaving — too close to the page numbers.
The easiest way to fix a Table of Contents: nuke & replace
To fix the Table of Contents, I basically replace it. Yes, there are other ways to modify TOC entries (if you’re already comfortable with Styles and are okay with modifying them individually), but I prefer this method because it doesn’t involve me searching all over the document for each TOC entry Style and modifying it separately. To-may-to, to-mah-to.
First, we select the entire Table of Contents with the mouse and hit Delete.
Next, we can re-define the Table of Contents the way we want. To do that, we go to the References tab and find the Table of Contents menu on the far left:

That brings us to the Table of Contents dialog box. We’ll click Modify at the bottom:

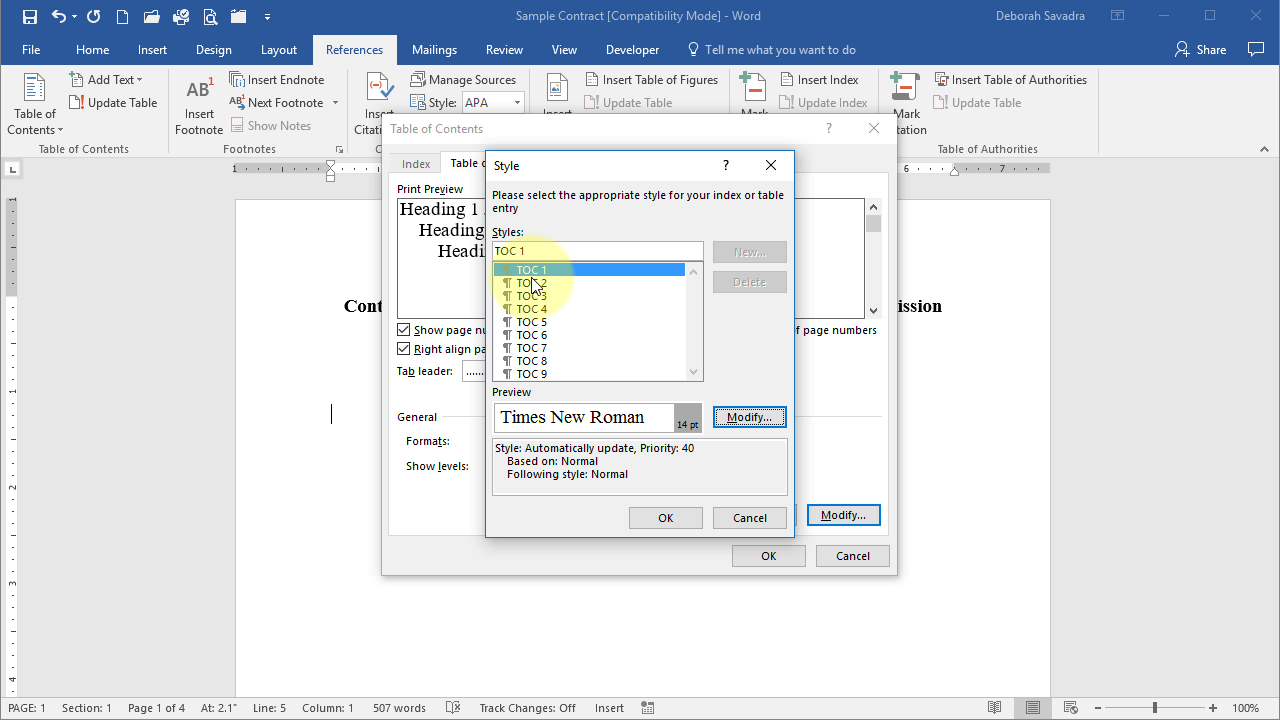
… which will take us to the Style dialog box:

The secret to controlling TOC formatting: Styles
This dialog box lists all of the Styles associated with Table of Contents entries. Since the Styles control the formatting of the entries in the Table of Contents, we need to modify the Styles to correct the formatting. The first entry that has incorrect formatting is TOC 2 (the second-level entries). Click on that (click #1 above) to see the current settings in the Preview window, then click on Modify (click #2).

Here’s where we can fix everything that’s wrong with the second-level TOC entries: we can change the font from Arial to Times New Roman with the drop-down in the center, and we can fix the paragraph issues (the right indentation and the amount of vertical space before and after) by clicking on the Format button at the bottom and choosing Paragraph from the menu.
That will take us to the familiar Format Paragraph dialog box:

We can repeat the same steps for any other TOC entries that need adjusting, but you get the idea, right?
To check our progress, we go back to the Table of Contents dialog box:
Use Print Preview as a guide


Before …
… and after
Notice how the Print Preview window (circled in red) has changed from the first time we saw it. Also notice that, if we want more/fewer TOC levels, or we want to alter or delete the dot leader, those options are available under General (in the lower third of the dialog box).
Now that we have finished modifying the TOC Styles, we can click OK to insert the new Table of Contents.
TOC Problems & Solutions
Sometimes, it’s not just the formatting of the Table of Contents that presents a challenge.
“It’s all caps in the brief. WHY ISN’T IT ALL CAPS IN THE TABLE OF CONTENTS?”
Here’s one reader’s particularly infuriating dilemma: All of her headings were in ALL CAPS in the brief, but somehow one of them was showing up in the Table of Contents as mixed or lower case. She double-checked and triple-checked and could not for the life of her figure out why this was happening.
Short version: If the ALL CAPS formatting of the heading is being performed by the Heading Style rather than the text having been typed in all capital letters, then the TOC will show it the way it was typed (lower-case or mixed case, depending on how it was typed). The TOC entries have their own Styles, so they won’t pick up any formatting from the document itself.
If you’re experiencing this problem with one of your headings, here’s a quick test: select and copy the text of the heading from the body of your document and paste it into Notepad or some other plain text editor (so none of the formatting follows). If the pasted version doesn’t appear in ALL CAPS, there’s the source of your problem.
Click here for a fuller explanation.
“What if I want to update a document from marked TOC entries from TOC codes to Styles?”
You can use Find and Replace to strip all of the TOC codes out of your document:

That’s the caret symbol (^) found at SHIFT-6, the number 19, a space, and the letters TC
To use the Find and Replace dialog box, use the shortcut key CTRL-H or go to the Editing area of the Home tab (all the way to the right) and click Replace:

Then type the text exactly as you see it above: a caret symbol (^) made by pressing down the SHIFT key and pressing the number 6 on the number keys across the top, then the numerals 19, then a SPACE, then the letters TC. Click Replace All, and all of your TOC codes will have been stripped out.
Now, you can convert all your headings to Styles and use Styles to re-build your Table of Contents!
Thumbs up! The manual TOC generator indeed looks awkward, but I saw a situation where I could have used it: the TOC was a “summary of steps” on how to build a system. Thanks!